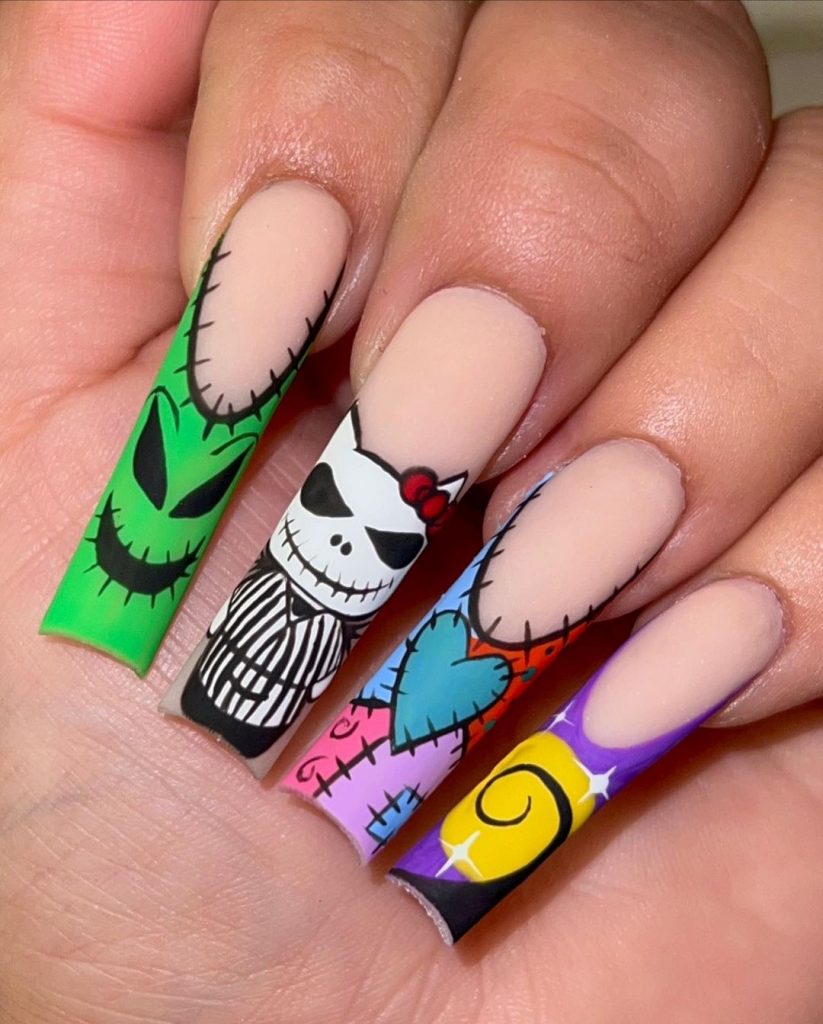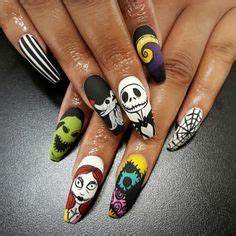
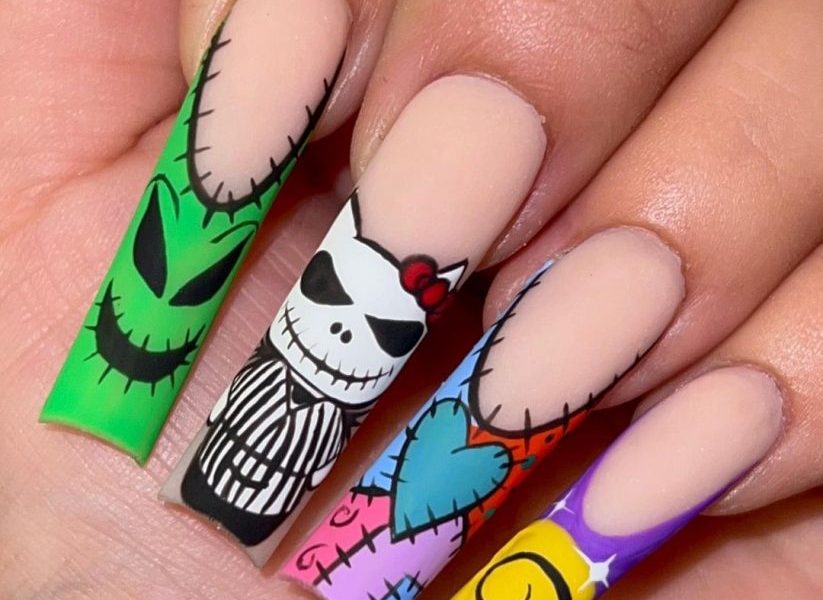
Get ready to bring a touch of spooky whimsy to your Halloween nails with this Nightmare Before Christmas-Inspired Fun manicure. Paying homage to Tim Burton’s iconic movie, this design features a different character or scene on each nail, capturing the vibrant and eerie charm of the beloved film. The long coffin shape of the nails offers plenty of space for intricate details, allowing each nail to become a miniature canvas. Bold greens, blues, purples, and the signature black and white stripes come together to create a design that’s both playful and hauntingly beautiful.
👇 Tap to Save This Nightmare-Inspired Design 📲💡
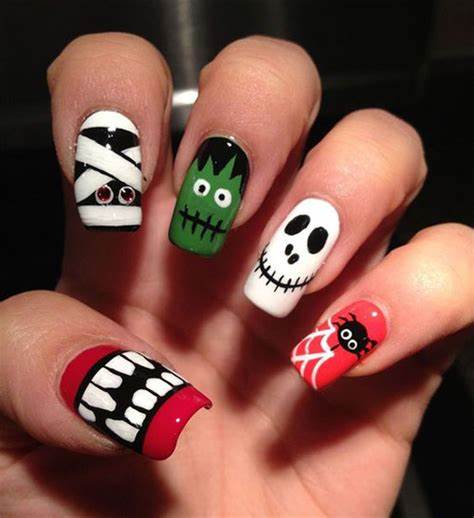
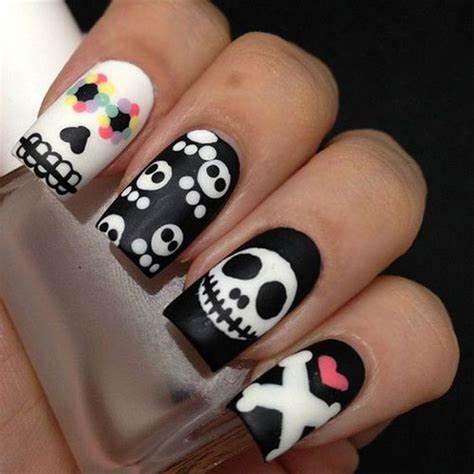
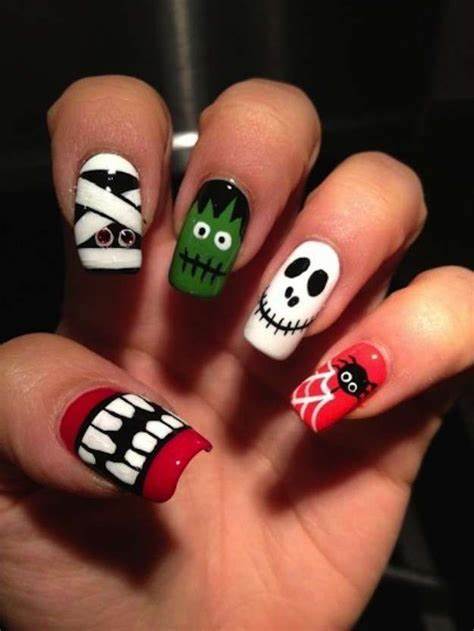
Fall Halloween Nails 2024: 22 Ideas for a Spooky and Stylish Manicure
Check out more ideas here!: Your ultimate guide to nailing the perfect Halloween look.
Why This Design Stands Out:
This manicure is a must-have for any fan of The Nightmare Before Christmas. The combination of bold colors and the matte finish perfectly captures the eerie yet whimsical essence of the movie. Each nail tells its own story, whether it’s showcasing Jack Skellington’s iconic grin, Sally’s patchwork dress, or the creepy-cool stripes that define the film’s aesthetic. The detailed artwork on each nail ensures that this manicure is a true conversation starter, perfect for Halloween parties or just embracing your inner Tim Burton fan.
What You’ll Need to Create This Look:
- Matte Top Coat: For that smooth, velvety finish that makes the colors pop. OPI’s Matte Top Coat is a great choice.
- Black and White Polishes: Essential for the stripes and Jack Skellington’s face. Essie’s “Licorice” and “Blanc” provide rich, opaque coverage.
- Green and Purple Polishes: To add those signature Nightmare hues. Try Essie’s “Off Tropic” and “Play Date” for vibrant color.
- Nail Art Brushes: For precision in painting the characters and scenes. The Winstonia Fine Line Brush Set offers excellent control for detailed work.
- Top Coat: To seal your design and protect it from chipping. Seche Vite Dry Fast Top Coat provides a glossy, long-lasting finish.
Step-by-Step DIY Guide:
- Start with the Base: Apply a white base coat to all nails to create a clean canvas for your design.
- Create the Stripes: Using black polish and a fine nail art brush, carefully paint black stripes on select nails. The stripes add a classic Tim Burton touch.
- Add the Characters: Paint each character or scene on a different nail using the green, purple, black, and white polishes. Use nail art brushes for precision, and add fine details like stitches, eyes, and mouths to bring the characters to life.
- Finish with a Matte Top Coat: Apply a matte top coat to all nails for a non-glossy finish that enhances the bold colors and gives your manicure a soft, velvety appearance.
Why You’ll Love This Design:
This Nightmare Before Christmas nail design is perfect for fans who want to carry a piece of the movie with them wherever they go. The blend of spooky and fun elements makes this manicure a great choice for Halloween, while the detailed artwork ensures that each nail stands out as a work of art. Whether you’re headed to a Halloween bash or just want to add a bit of Burton-esque flair to your everyday look, this manicure is sure to impress.
Ready to dive into more Halloween-inspired nail art? Check out our 10 spooky and stylish images for additional inspiration and ideas to make your Halloween manicure truly unique!